If you keep hearing that you need to target chord tones in your solos but you just don't know where to start, this one's for you.
There are so many options for chord tones, in different keys and over different chord types, that it's easy to freeze up and go straight back to running the scale. So we're going to start with just two notes. With those two notes you can hit a chord tone over every single chord in the key.
The two notes ▶ 0:05
We're in the key of A minor, and the two notes are:
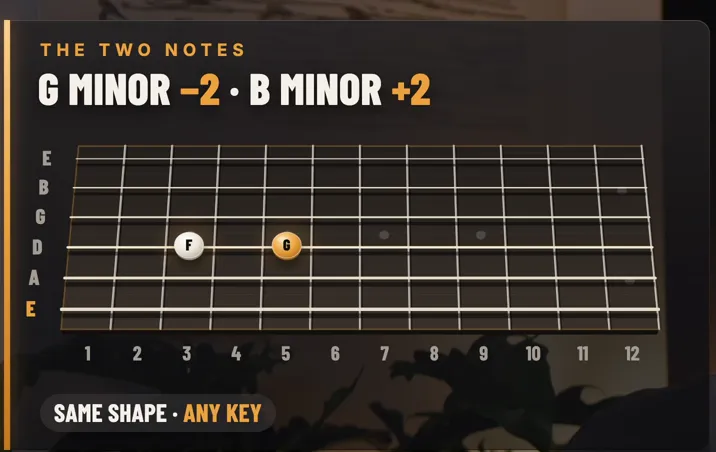
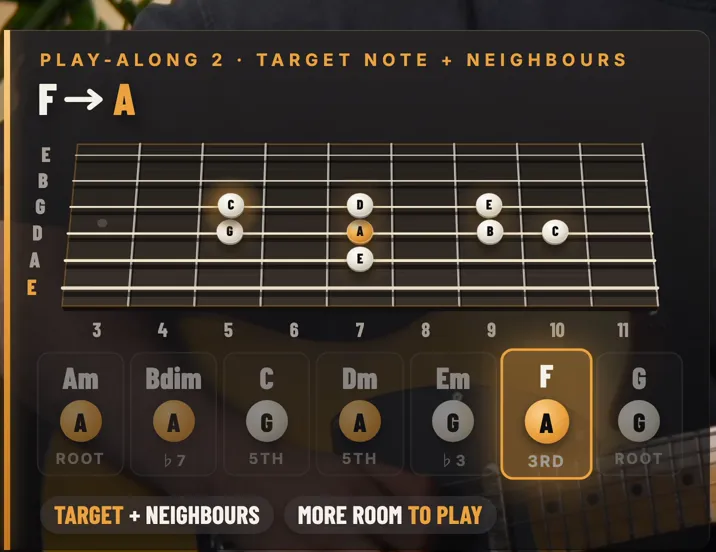
- 5th fret on the D string. That note is G.
- 7th fret on the D string. That note is A.
That's it. If you want to play in another key, you just move them. For G minor they go down two frets, and for B minor they go up two frets. The shape stays exactly the same.
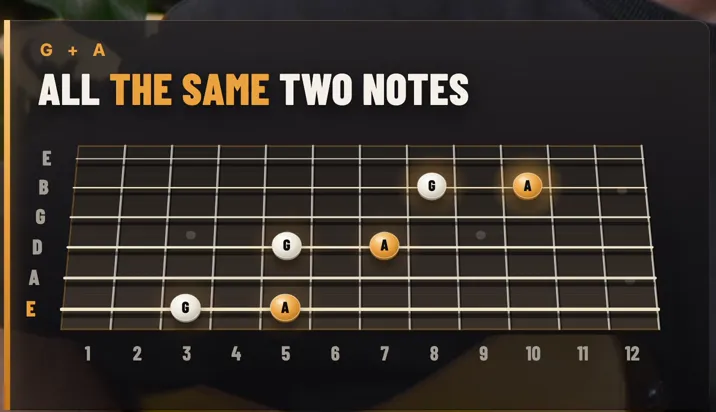
You can also play the same two notes in other octaves: the 3rd and 5th frets on the low E string, or the 8th and 10th frets on the B string. Same notes, different place on the neck.
The seven chords in A minor ▶ 0:49
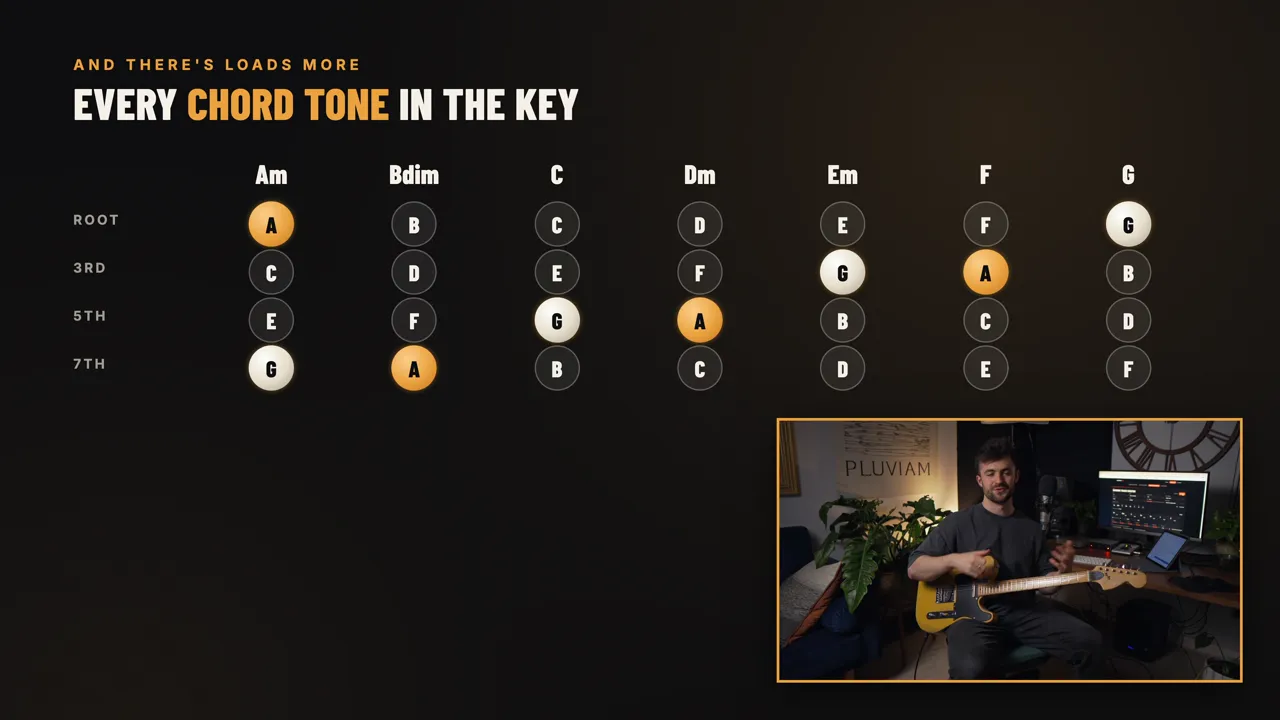
There are seven chords in the key of A minor: A minor, B diminished, C major, D minor, E minor, F major and G major. A minor is the relative minor of C major, so it's the same seven chords.
Here's which of our two notes goes over each one, and what it is in that chord:
- A minor: A (7th fret). The root.
- B diminished: stay on A. This is the only one that kind of breaks the rules, because A isn't one of the three notes in a B diminished triad. But when you hit it over B diminished you get a nice B half-diminished sound (Bm7♭5). You won't come across the diminished chord too much, so don't worry about it, but it's worth learning anyway.
- C major: G (5th fret). The 5th of C.
- D minor: A. The 5th of D minor.
- E minor: G. The minor 3rd of E minor.
- F major: A. The 3rd of F.
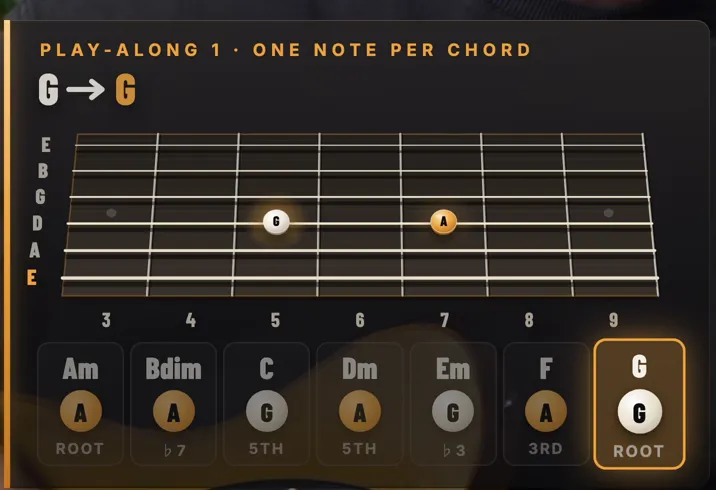
- G major: G. The root.
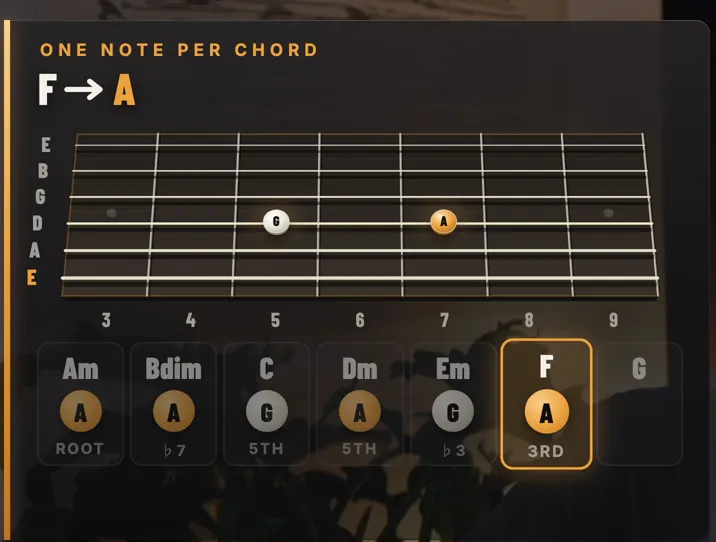
So you're only ever moving between two frets, but every time the chord changes you're landing on a note that belongs to it.
Hearing it in context ▶ 3:29
Knowing which note goes where is one thing. You need to hear it working over the chords, so put on a backing track that runs through the seven chords in order, A through to G, and just hit the right note as each chord comes in.
Honestly, it'll sound very boring. But you can hear it works, and that's the point of this first step: every time the chord changes, you know exactly where you're landing.
I made a free Backing Track Creator for exactly this. I always found it a little annoying with my students when I'd find a backing track and it just wouldn't quite suit what I was trying to show them. With this one you can set the order of the chords, how long each one lasts, the drum beat and the tempo. It's a bit rudimentary and it won't sound like a finished song, but it definitely works for this kind of practice.
Add a note or two either side ▶ 4:01
Once that feels comfortable, do the same thing again, but add a note or two either side of your target. I'd also double the length of each chord so you've got a bit more time to play around with each one.
You're still aiming for G or A every time the chord changes, but now you're getting there from somewhere, which is where it starts to sound like a solo rather than an exercise.
Use the other octaves ▶ 4:51
Remember, these notes are all over the neck. Instead of doing everything on the D string, try the same idea on the low E string at the 3rd and 5th frets, on the B string at the 8th and 10th frets, or 12 frets higher on any of them.
Where to go next ▶ 5:10
This is just a start. There's loads more you could hit. You could go for the root, 3rd and 5th of every chord, and later get into more interesting chord tones, modes, everything.
But two notes is a really solid place to be. From here you branch out: start hitting some other notes, test some other ones, see if you can build some little phrases. The nice thing about only having two notes is that it forces you to be interesting. You can't hide behind running up and down a scale.
Put on a backing track, start with one note per chord, and have a play around with it.